Are you looking for some minimal lighting with a big impact? Well, look no further. Fairy Lights can do just that.
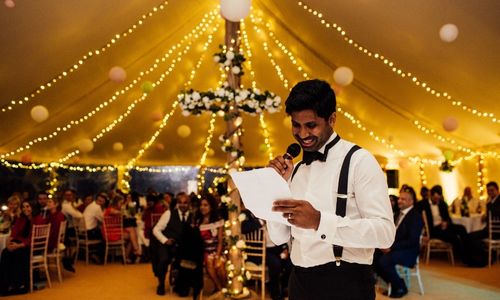
Each year we receive huge demand for our fairy lights, being a popular decoration within the event industry during both the summer and winter seasons. Lighting can take any venue to the next level, being used to create a warm and cozy atmosphere. They look beautiful in wedding marquees, adding a twinkle to Christmas displays, adding a particular charm to events within more rustic venues such as barns or village halls and overall being used to create aesthetic looks - whether that be throughout outdoor spaces, wrapped around trees, a backdrop for a photobooth or on the dance floor.
From festoon lights to fairy lights, whether you’re using full canopies or singular strings – there really is a perfect lighting opportunity for all events! At Essential Supplies, we offer a comprehensive range of fairy lights and accessories to help you create your ideal setup.
Why Use Fairy Lights in your Events?
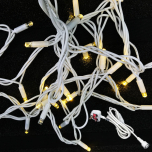
Our fairy lights really couldn’t be any simpler to put together! It can create a spectacular setting inside a wedding marquee, in a garden or simply overhead in the night sky. You’ll then need to decide on which colour cable to have for your backdrop, this will either be black or white. It depends on what look you’re after. Black cable would probably be used if you were looking to create an outdoor canopy as it will blend in perfectly with darkness. The white cable is used against a white backdrop, such as those in a marquee or tipi.
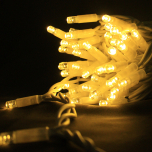
Once this has been decided you then need to choose on whether you would like cold white or warm white lights. Warm white lighting is one of the most popular colours of fairy lights in the events industry. This is because it creates a warm and inviting feeling, perfect for a more homely atmosphere at dinner time, and when used with a dimmer, it can really soften the mode when it’s time for coffees.
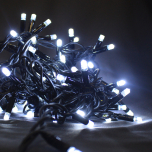
On the other end of the scale, you’ve got cold white lighting. This has a more bluey tone, which gives off a brighter feel. Cold white would be better suited for where you want the lighting to be a bit brighter and lively, or used to highlight a frosty look in an outdoor Christmas setting.
Once you’ve made your decision on the style of lighting, you’re probably thinking “well how do I create a canopy?” Well, look no further as we’ve got you covered on all the options of what you can create.
How to create a Tipi Fairy Light Canopy
*Diameter 20m and tent roof height of 18m, roof pitch 30 - 40 degrees
In this first instance, we create a majestic Tipi canopy from a spiralling centre pillar or light. The fairy lights then hang down the eaves and around the contours of the Tipi, highlighting and giving accent to the shape. This is achieved with the 12-way adaptor as the crown / ring (as they are sometimes called) fixed to the central peak and spanning down and around the entire circumference and walls.
You will need:
- 1x 16A starter (13A available for domestic socket use)
*Measurements and recommendations are approximated.
Assembly
- Create this fairy tale look in your marquee. From your power supply, run the starter with extension leads under the floor to the base of the central pole of the tipi.
- Now, connect 2 x 10m lengths and spiral around the pole from floor to ceiling. Ensure plugs to sockets are correctly laid out at each end.
- Note: Try to space out the spirals evenly until you use the entire string up the pole.
- Connect the 12-Way Adaptor at the top and circle around the crown of the Tipi so that all the outlets fan out.
- Connect the 12 x 10m White Cable, Warm White Fairy Lights to the 12 sockets at the Tipi-top and hang them down the eaves. Tie them off to the wall-tops of the Tipi with some resealable cable ties.
- From one of the wall-top outlets, connect the 3-way splitter
- From each wall-top, connect the 12x 3.3m Strings to run down the walls to the floor and tie off at the floor.
- Finally, for the wall-top, daisy chain together the remaining 6x 10m and 1x 3.3m fairy light string together (approx. circumference of the 20m diameter Tipi), hanging them in a circle around the wall-top and connecting to one of the spare sockets of the 3-way splitter outlet.
Optional Extras
Why not attach a dimmer to the mains outlet and control the mood. You’ll want to place the dimmer in a reachable location so you may need to get more extension leads
- 16A outlet LED Dimmer to mains 13A or 16A plug
- 2x 16A 5m extension leads. Power into dimmer at the hosts control desk, and back out again
This set-up will truly enhance your Tipi. Contact us for details on creating your perfect canopy or why not check out our entry level Canopy Package on offer, to achieve a similar design.
How to create this look within the marquee roof:
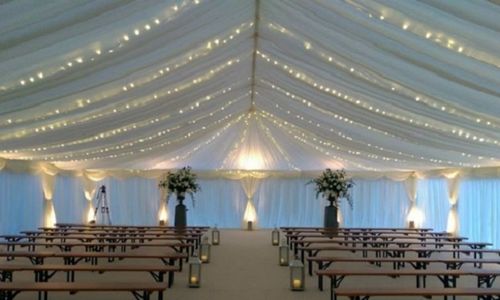
A relatively easy set-up of a marquee eaves roof fairy light ceiling. We take 10m Warm White, White Cable Fairy Lights and space them at 3m intervals across an 18m long space. Extensions are 6m in length so intervals can be increased for longer marquees.
You Will Need:
- One 13A or 16a starter set.
Assembly
- Firstly, find where the incoming power is and connect your 13A or 16A starter.
- Use an initial Extension Cable to run towards the first 10m Fairy Light string, where it begins in the eaves. (If one is not enough, make get more)
- Now connect 2 of the 10m strings together and pass along the ceiling at the first interval. Tie off the fairy lights at the top and in the eaves to hold the strings in place.
- Connect the first interval to the incoming extension lead
- Now connect the next extension of the outgoing fairy light string you just hung, and then run along the eaves to the next interval.
- Repeat the steps 3-5 above until complete. The last socket of the entire run can remain sealed.
Optional Extras
- Why not attach a dimmer to the mains outlet and control the mood. You’ll want to place the dimmer in a reachable location so you may need to get more extension leads
- Try some Wired Uplighters with power cables. (Or maybe battery-operated uplighters, wireless and hassle-free)
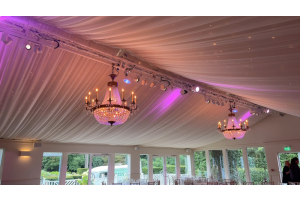
- What about a centrepiece. One or more chandeliers down the centre would look spectacular and give a truly fairy tale look to a marquee room.
The fairy lights can be strung either behind or in front of the linings to create the look shown.
We suggest (spacing/qty/how to suspend etc).
Purchase our Fairy Light Package (strings and starter) on offer at a reduced amount for buying all at once. Extension leads sold separately.
We hope you found these designs and set-ups useful.
We really can help you create the lighting you’ve been dreaming of! These are just some of the examples of great event lighting set-ups. We’ve also made some canopy and fairy light packages available online already. These basic set-ups get you started, and you can always add more to them later, but try these first if you’re looking for some ready-to-go lighting with an effortless setup.
FAQ’s General
What is a fairy light starter?
The fairy light starter is your power cable that would plug into your mains. We provide both 13A three-pin plug starters and 16A versions for commercial use, available here
What colour fairy lights do you do?
We provide two lamp colours. Warm White, is great for indoor warm and cosy settings and Cold White can really brighten up an outdoor setting or even create a winter wonderland.
Can I add your Fairy Lights with other makes?
No, our fairy lights only work with our own products. This is because of the use of our proprietary connectable ends which allows you to connect more than one length together, extend or split off in various directions. You should have everything you need if you buy from Essential Supplies.
What is special about your Connectable Range?
Our Fairy Lights use our proprietary connectable ends to link strings of lights together. With our extensions and splitters, it means you can create many different and decorative designs. Read some of our ideas above.
My incoming power is far from where the fairy lights will go, how do solve this?
That’s fine. We have extension leads to stretch any distance. If the connectable extensions are not enough, let us know and we can work this out.
Are your fairy lights suitable for outdoor use?
Yes, the greatest part about our Fairy Lights is that they are manufactured from quality, durable rubber cable and IP67 connectors so they can withstand the harsh outdoor weather for a long time.